
第7章-CompletableFuture异步编排.md 33 KB
第7章-CompletableFuture异步编排
学习目标:
- CompletableFuture异步任务应用场景
- 掌握CompletableFuture相关API的应用
- 基于CompletableFuture+自定义线程池实现优化商品数据接口调用
- 基于CompletableFuture实现首页商品分类
1、CompletableFuture异步编排
问题:查询商品详情页的逻辑非常复杂,数据的获取都需要远程调用,必然需要花费更多的时间。
假如商品详情页的每个查询,需要如下标注的时间才能完成
- 获取sku的基本信息+sku的图片信息 1s
- 获取商品所属三级分类 0.5s
- 获取spu的所有销售属性 1s
- 商品sku价格 0.5s
- 获取商品海报列表 0.5s
- 获取商品Sku平台属性以及值 0.5s
- ......
那么,用户需要4s后才能看到商品详情页的内容。很显然是不能接受的。如果有多个线程同时完成这4步操作,也许只需要1.5s即可完成响应。
1.1 CompletableFuture介绍
Future是Java 5添加的接口,用来描述一个异步计算的结果。你可以使用isDone方法检查计算是否完成,或者使用get阻塞住调用线程,直到计算完成返回结果,你也可以使用cancel方法停止任务的执行。
在Java 8中, 新增加了一个包含50个方法左右的类: CompletableFuture,提供了非常强大的Future的扩展功能,可以帮助我们简化异步编程的复杂性,提供了函数式编程的能力,可以通过回调的方式处理计算结果,并且提供了转换和组合CompletableFuture的方法。
CompletableFuture类实现了Future接口,所以你还是可以像以前一样通过get方法阻塞或者轮询的方式获得结果,但是这种方式不推荐使用。
CompletableFuture和FutureTask同属于Future接口的实现类,都可以获取线程的执行结果。

1.2 创建异步对象
CompletableFuture 提供了四个静态方法来创建一个异步操作。

没有指定Executor的方法会使用ForkJoinPool.commonPool() 作为它的线程池执行异步代码。如果指定线程池,则使用指定的线程池运行。以下所有的方法都类同。
- runAsync方法不支持返回值。
supplyAsync可以支持返回值。
package com.atguigu.gmall;

import lombok.extern.slf4j.Slf4j;

import java.util.concurrent.CompletableFuture;
import java.util.concurrent.ExecutionException;
import java.util.concurrent.TimeUnit;
import java.util.concurrent.TimeoutException;

/**
* @author: atguigu
* @create: 2023-04-25 09:35
*/
//@SpringBootTest
@Slf4j
public class CompletableFutureTest {

public static void main(String[] args) throws ExecutionException, InterruptedException, TimeoutException {
    //1.创建异步任务对象 ForkJoinPool默认的线程池对象
    //1.1 需要获取线程返回结果 参数类型函数式接口:Supplier有返回值
    CompletableFuture<String> supplyAsync = CompletableFuture.supplyAsync(() -> {
        //异步子线程执行逻辑
        log.info("supplyAsync异步任务执行");
        try {
            TimeUnit.SECONDS.sleep(1);
        } catch (InterruptedException e) {
            throw new RuntimeException(e);
        }
        return "atguigu-SupplyAsync";
    });
    // 调用异步任务对象 get 方法 阻塞等待子线程执行结果
    String s = supplyAsync.get();
    // 调用异步任务对象 get(等待时间) 超过执行最大等待时间抛出:TimeoutException
    //String s = supplyAsync.get(1, TimeUnit.SECONDS);
    log.info("获取线程执行结果:{}", s);

    //1.2 不需要获取线程返回结果
    CompletableFuture<Void> runAsync = CompletableFuture.runAsync(() -> {
        log.info("runAsync 异步任务执行");
    });
}
}
1.3 计算完成时回调方法
当CompletableFuture的计算结果完成,或者抛出异常的时候,可以执行特定的Action。主要是下面的方法:

whenComplete可以处理正常或异常的计算结果
exceptionally处理异常情况。BiConsumer<? super T,? super Throwable>可以定义处理业务
whenComplete 和 whenCompleteAsync 的区别:
whenComplete:是执行当前任务的线程执行继续执行 whenComplete 的任务。
whenCompleteAsync:是执行把 whenCompleteAsync 这个任务继续提交给线程池来进行执行。
方法不以Async结尾,意味着Action使用相同的线程执行,而Async可能会使用其他线程执行(如果是使用相同的线程池,也可能会被同一个线程选中执行)
代码示例:
/**
 * 执行任务完毕后,指定执行特定回调方法
 * @param args
 * @throws ExecutionException
 * @throws InterruptedException
 * @throws TimeoutException
 */
public static void main(String[] args) throws ExecutionException, InterruptedException, TimeoutException {
    //1.创建异步任务对象 ForkJoinPool默认的线程池对象
    //1.1 需要获取线程返回结果 参数类型函数式接口:Supplier有返回值
    CompletableFuture<String> supplyAsync = CompletableFuture.supplyAsync(() -> {
        //异步子线程执行逻辑
        log.info("supplyAsync异步任务执行");
        int i = 1 / 0;
        return "atguigu-SupplyAsync";
    });
    //CompletableFuture<String> complete = supplyAsync.whenComplete((r, e) -> {
    //    log.info("whenComplete,子线程执行完毕后,执行其他代码逻辑:r----{}", r);
    //    log.info("whenComplete:e----{}", e);
    //});
    CompletableFuture<String> exceptionally = supplyAsync.exceptionally(e -> {
        log.info("exceptionally,前面线程异常:{}", e);
        return 6666L + "";
    });
    //String s = complete.get();
    //log.info("s:{}", s);

    String s1 = exceptionally.get();
    log.info("s1:{}", s1);
}
1.4 线程串行化与并行化方法
thenApply 方法:当一个线程依赖另一个线程时,获取上一个任务返回的结果,并返回当前任务的返回值。

thenAccept方法:消费处理结果。接收任务的处理结果,并消费处理,无返回结果。

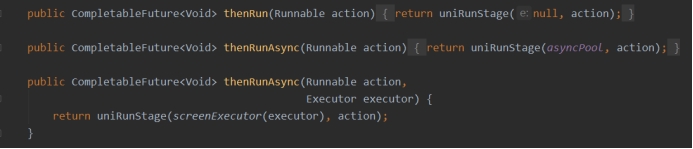
thenRun方法:只要上面的任务执行完成,就开始执行thenRun,只是处理完任务后,执行 thenRun的后续操作
带有Async默认是异步执行的。这里所谓的异步指的是不在当前线程内执行。
Function<? super T,? extends U>
T:上一个任务返回结果的类型
U:当前任务的返回值类型
代码演示:
/**
 * 多组异步任务执行
 *  thenApply 当前任务依赖于上一个任务执行结果,当前任务返回结果(返回任务类型)
 * @param args
 */
public static void main(String[] args) throws ExecutionException, InterruptedException {
    //1.创建异步任务A 带返回结果异步任务对象
    CompletableFuture<String> futureA = CompletableFuture.supplyAsync(() -> {
        log.info("模拟A线程执行业务.....");
        return "A";
    });
    //2.1 闯异步任务B 依赖异步A的结果 并且返回 B线程结果
    CompletableFuture<Long> futureB = futureA.thenApply((rA) -> {
        log.info("模拟B线程执行业务中需要获取A任务结果:{}", rA);
        //return rA + ":B";
        return 666L;
    });
    //2.2 闯异步任务C 依赖异步A的结果 并且返回 C线程结果
    CompletableFuture<String> futureC = futureA.thenApply(rA -> {
        log.info("模拟C线程执行业务中需要获取A任务结果:{}", rA);
        return rA + "C";
    });

    //3. 保证任务都执行调用异步任务对象方法 get 阻塞等待当前异步任务结果
    Long b = futureB.get();
    log.info("B线程执行结果:{}", b);
    String c = futureC.get();
    log.info("C线程执行结果:{}", c);
}
public static void main(String[] args) throws ExecutionException, InterruptedException {
    //1.创建异步任务A 带返回结果异步任务对象
    CompletableFuture<String> futureA = CompletableFuture.supplyAsync(() -> {
        log.info("模拟A线程执行业务.....");
        return "A";
    });
    //2.创建异步任务B 依赖A任务执行结果, B 无返回值
    CompletableFuture<Void> futureB = futureA.thenAccept(rA -> {
        log.info("模拟B线程执行业务中需要获取A任务结果:{}", rA);
    });
    //2.创建异步任务C 依赖A任务执行结果, C 无返回值
    CompletableFuture<Void> futureC = futureA.thenAccept(rA -> {
        log.info("模拟C线程执行业务中需要获取A任务结果:{}", rA);
    });

    CompletableFuture<Void> futureD = futureA.thenRun(() -> {
        log.info("模拟D线程(无法获取上一个任务结果,本任务不返回结果)执行...");
    });

    futureB.get();
    futureC.get();
    futureD.get();
}
1.5 多任务组合
public static CompletableFuture<Void> allOf(CompletableFuture<?>... cfs);
public static CompletableFuture<Object> anyOf(CompletableFuture<?>... cfs);
- allOf:等待所有任务完成
anyOf:只要有一个任务完成 注意:组合后要调用.join()方法
public static void main(String[] args) throws ExecutionException, InterruptedException {
//1.创建异步任务A 带返回结果异步任务对象
CompletableFuture<String> futureA = CompletableFuture.supplyAsync(() -> {
    log.info("模拟A线程执行业务.....");
    return "A";
});
//2.创建异步任务B 依赖A任务执行结果, B 无返回值
CompletableFuture<Void> futureB = futureA.thenAccept(rA -> {
    try {
        TimeUnit.SECONDS.sleep(1);
    } catch (InterruptedException e) {
        throw new RuntimeException(e);
    }
    log.info("模拟B线程执行业务中需要获取A任务结果:{}", rA);
});
//2.创建异步任务C 依赖A任务执行结果, C 无返回值
CompletableFuture<Void> futureC = futureA.thenAccept(rA -> {
    try {
        TimeUnit.SECONDS.sleep(1);
    } catch (InterruptedException e) {
        throw new RuntimeException(e);
    }
    log.info("模拟C线程执行业务中需要获取A任务结果:{}", rA);
});

//3. 组合多个任务
//所有异步任务只要有一个执行完毕,主线程就继续
//CompletableFuture.anyOf(futureA, futureB, futureC);
//所有异步任务必须全部执行完,主线程才会继续
CompletableFuture.allOf(futureA, futureB, futureC).join();
log.info("主线程继续执行");
}
1.6 优化商品详情页
1.6.1. 自定义线程池
好处:
- 效率高,提交待任务,不需要等待线程创建,直接使用线程池中线程执行任务
- 减少资源消耗,线程是稀缺资源
- 统一管理线程,方便监控
在service-item模块中新建包名:com.atguigu.gmall.item.config 新增线程池配置类:ThreadPoolConfig
package com.atguigu.gmall.item.config;

import org.springframework.context.annotation.Bean;
import org.springframework.context.annotation.Configuration;

import java.util.concurrent.ArrayBlockingQueue;
import java.util.concurrent.Executors;
import java.util.concurrent.ThreadPoolExecutor;
import java.util.concurrent.TimeUnit;

/**
 * 全局自定义线程池配置
 */
@Configuration
public class ThreadPoolConfig {

    @Bean
    public ThreadPoolExecutor threadPoolExecutor(){
        //动态获取服务器核数
        int processors = Runtime.getRuntime().availableProcessors();
        ThreadPoolExecutor threadPoolExecutor = new ThreadPoolExecutor(
                processors*2, // 核心线程个数 io:2n ,cpu: n+1  n:内核数据
                processors*2,
                0,
                TimeUnit.SECONDS,
                new ArrayBlockingQueue<>(20),
                Executors.defaultThreadFactory(),
                new ThreadPoolExecutor.AbortPolicy()
        );
        //  返回线程池对象
        return threadPoolExecutor;
    }
}
1.6.2. 优化商品详情数据
对service-item模块中ItemServiceImpl类中的getBySkuId方法进行优化
@Autowired
private Executor executor;

/**
 * 查询商品信息,汇总详情页面需要数据
 * 1.根据SkuID查询商品SKU基本信息包含图片列表-返回sku商品对象
 * 2.根据三级分类ID查询所属分类信息
 * 3.根据SkuID查询价格
 * 4.根据spuId查询商品海报列表
 * 5.根据skuId查询平台属性列表
 * 6.根据spuID+SkuId查询销售属性 选中当前商品销售属性
 * 7.根据spuID查询销售属性跟sku对照关系-选择销售属性组合,切换SKU
 *
 * @param skuId
 * @return
 */
@Override
public Map<String, Object> getItemInfo(Long skuId) {

    //0.判断用户访问商品不存在 则说明是非法访问,直接返回  反之执行远程调用 todo 交付测试前注释放开
    //RBloomFilter<Long> bloomFilter = redissonClient.getBloomFilter(RedisConst.SKU_BLOOM_FILTER);
    //boolean contains = bloomFilter.contains(skuId);
    //if (!contains) {
    //    throw new RuntimeException("访问数据不存在!");
    //}

    Map<String, Object> mapResult = new HashMap<>();

    //1. 根据SkuID查询商品SKU基本信息包含图片列表 - 返回sku商品对象  -- 产生异步任务对象-后续其他任务需要使用返回结果
    CompletableFuture<SkuInfo> skuInfoCompletableFuture = CompletableFuture.supplyAsync(() -> {
        SkuInfo skuInfo = productFeignClient.getSkuInfo(skuId);
        if (skuInfo != null) {
            mapResult.put("skuInfo", skuInfo);
        }
        return skuInfo;
    }, executor);

    //2. 根据三级分类ID查询所属分类信息     -- 当前异步任务对象依赖于其他线程,获取上一个线程返回结果
    CompletableFuture<Void> categorCompletableFuture = skuInfoCompletableFuture.thenAccept(skuInfo -> {
        BaseCategoryView categoryView = productFeignClient.getCategoryView(skuInfo.getCategory3Id());
        if (categoryView != null) {
            mapResult.put("categoryView", categoryView);
        }
    });

    //3. 根据SkuID查询价格
    CompletableFuture<Void> priceCompletableFuture = CompletableFuture.runAsync(() -> {
        BigDecimal skuPrice = productFeignClient.getSkuPrice(skuId);
        if (skuPrice != null) {
            mapResult.put("price", skuPrice);
        }
    }, executor);

    //4. 根据spuId查询商品海报列表
    CompletableFuture<Void> spuPosterListCompletableFuture = skuInfoCompletableFuture.thenAcceptAsync(skuInfo -> {
        List<SpuPoster> spuPosterList = productFeignClient.getSpuPosterBySpuId(skuInfo.getSpuId());
        if (!CollectionUtils.isEmpty(spuPosterList)) {
            mapResult.put("spuPosterList", spuPosterList);
        }
    }, executor);

    //5. 根据skuId查询平台属性列表
    CompletableFuture<Void> skuAttrListCompletableFuture = CompletableFuture.runAsync(() -> {
        List<BaseAttrInfo> attrInfoList = productFeignClient.getAttrList(skuId);
        if (!CollectionUtils.isEmpty(attrInfoList)) {
            mapResult.put("skuAttrList", attrInfoList);
        }
    }, executor);


    //6. 根据spuID + SkuId查询销售属性 选中当前商品销售属性
    CompletableFuture<Void> spuSaleAttrListCompletableFuture = skuInfoCompletableFuture.thenAcceptAsync(skuInfo -> {
        List<SpuSaleAttr> spuSaleAttrList = productFeignClient.getSpuSaleAttrListCheckBySku(skuId, skuInfo.getSpuId());
        if (!CollectionUtils.isEmpty(spuSaleAttrList)) {
            mapResult.put("spuSaleAttrList", spuSaleAttrList);
        }
    }, executor);

    //7. 根据spuID查询销售属性跟sku对照关系-选择销售属性组合,切换SKU  TODO 前端解析是JSON字符串
    CompletableFuture<Void> valuesSkuJsonCompletableFuture = skuInfoCompletableFuture.thenAcceptAsync(skuInfo -> {
        Map skuValueIdsMap = productFeignClient.getSkuValueIdsMap(skuInfo.getSpuId());
        if (!CollectionUtils.isEmpty(skuValueIdsMap)) {
            mapResult.put("valuesSkuJson", JSON.toJSONString(skuValueIdsMap));
        }
    }, executor);

    //x.等待所有异步任务并行执行完毕,主线程继续执行响应结果
    CompletableFuture.allOf(
            skuInfoCompletableFuture,
            categorCompletableFuture,
            priceCompletableFuture,
            spuPosterListCompletableFuture,
            skuAttrListCompletableFuture,
            spuSaleAttrListCompletableFuture,
            valuesSkuJsonCompletableFuture
    ).join();
    return mapResult;
}
1.7 SpringBoot线程池(了解)
Springboot线程池实现关键类:ThreadPoolTaskExecutor默认线程池实现,为什么不采用Springboot默认线程池?
private int maxPoolSize = Integer.MAX_VALUE;
private int queueCapacity = Integer.MAX_VALUE;
原因:最大线程数跟阻塞队列长度Integer最大值,存在OOM风险.
一般Springboot应用采用自定义线程池:配置自定义线程池
package com.atguigu.gmall.product.config;


import org.springframework.context.annotation.Bean;
import org.springframework.context.annotation.Configuration;
import org.springframework.scheduling.concurrent.ThreadPoolTaskExecutor;

import java.util.concurrent.Executor;
import java.util.concurrent.ThreadPoolExecutor;

/**
 * 创建自定义线程池配置类
 *
 * @Author
 * @Date 2022-04-05 17:26
 **/
@Configuration
public class AsyncScheduledTaskConfig {

    /**
     * 1.这种形式的线程池配置是需要在使用的方法上面添加@Async("customAsyncThreadPool")注解的
     * 2。如果在使用的方法上不添加该注解,那么spring就会使用默认的线程池
     * 3.所以如果添加@Async注解但是不指定使用的线程池,又想自己自定义线程池,那么就可以重写spring默认的线程池
     * 4.所以第二个方法就是重写spring默认的线程池
     *
     * @return
     */
    @Bean("customAsyncThreadPool")
    public Executor customAsyncThreadPool() {
        ThreadPoolTaskExecutor executor = new ThreadPoolTaskExecutor();
        //最大线程数
        executor.setMaxPoolSize(32);
        //核心线程数
        executor.setCorePoolSize(32);
        //任务队列的大小
        executor.setQueueCapacity(20);
        //线程池名的前缀
        executor.setThreadNamePrefix("product-threadpool-");
        //允许线程的空闲时间30秒
        executor.setKeepAliveSeconds(0);
        //设置线程池关闭的时候等待所有任务都完成再继续销毁其他的Bean-项目优雅关闭
        executor.setWaitForTasksToCompleteOnShutdown(true);
        //设置线程池中任务的等待时间,如果超过这个时候还没有销毁就强制销毁,以确保应用最后能够被关闭,而不是阻塞住
        executor.setAwaitTerminationSeconds(30);

        /**
         * 拒绝处理策略
         * CallerRunsPolicy():交由调用方线程运行,比如 main 线程。
         * AbortPolicy():直接抛出异常。
         * DiscardPolicy():直接丢弃。
         * DiscardOldestPolicy():丢弃队列中最老的任务。
         */
        /**
         * 特殊说明:
         * 1. 这里演示环境,拒绝策略咱们采用抛出异常
         * 2.真实业务场景会把缓存队列的大小会设置大一些,
         * 如果,提交的任务数量超过最大线程数量或将任务环缓存到本地、redis、mysql中,保证消息不丢失
         * 3.如果项目比较大的话,异步通知种类很多的话,建议采用MQ做异步通知方案
         */
        executor.setRejectedExecutionHandler(new ThreadPoolExecutor.AbortPolicy());
        //线程初始化
        executor.initialize();
        System.out.println("---------------------------");
        return executor;
    }
}
启动类上开启异步 @EnableAsync
@EnableAsync  //开启SpringBoot异步 默认情况使用内置线程池对象 一定要使用自定义线程池
public class ProductApp implements CommandLineRunner {
}
异步方法上加注解 @Async
@Override
@Async("customAsyncThreadPool")
public void testAsync(String param) {
    log.info("任务执行了..,线程名称:{}," + param, Thread.currentThread().getName());
}
2、首页商品分类实现

前面做了商品详情,我们现在来做首页分类,我先看看京东的首页分类效果,我们如何实现类似效果:

思路:
1,首页属于并发量比较高的访问页面,我看可以采取页面静态化方式实现,或者把数据放在缓存中实现
2,我们把生成的静态文件可以放在nginx访问或者放在web-index模块访问
2.1 修改pom.xml
在web-all模块中新增商品服务依赖
<dependency>
    <groupId>com.atguigu.gmall</groupId>
    <artifactId>service-product-client</artifactId>
    <version>1.0</version>
</dependency>
2.2 封装数据接口
由于商品分类信息在service-product模块,我们在该模块封装数据,数据结构为父子层级
商品分类保存在base_category1、base_category2和base_category3表中,由于需要静态化页面,我们需要一次性加载所有数据,前面我们使用了一个视图base_category_view,所有我从视图里面获取数据,然后封装为父子层级
数据结构如下:json 数据结构
[
    {
        "index":1,     #序号
        "categoryName":"图书、音像、电子书刊",   #一级分类名称
        "categoryId":1,                       #一级分类ID
        "categoryChild":[                     #当前一级分类包含的二级分类集合
            {
                "categoryName":"电子书刊",     #二级分类名称
                "categoryId":1,               #二级分类ID
                "categoryChild":[             #当前二级分类包含的三级分类集合
                    {
                        "categoryName":"电子书",#三级分类名称
                        "categoryId":1         #三级分类ID
                    },
                    {
                        "categoryName":"网络原创",
                        "categoryId":2
                    }
                ]
            }
        ]
    },
    {
        "index":2,
        "categoryName":"手机",
        "categoryId":2,
        "categoryChild":[
            {
                "categoryName":"手机通讯",
                "categoryId":13,
                "categoryChild":[
                    {
                        "categoryName":"手机",
                        "categoryId":61
                    }
                ]
            },
            {
                "categoryName":"运营商",
                "categoryId":14
            },
            {
                "categoryName":"手机配件",
                "categoryId":15
            }
        ]
    }
]
2.2.1 控制器
YAPI接口地址:http://192.168.200.128:3000/project/11/interface/api/651
service-product模块中ProductApiController
/**
 * 查询所有分类列表 分类嵌套结果:一级分类分类对象中包含二级分类集合;在二级分类对象中包含三级分类集合
 * @return
 */
@GetMapping("/inner/getBaseCategoryList")
public List<JSONObject> getBaseCategoryList(){
    return baseCategoryViewService.getBaseCategoryList();
}
2.2.2 BaseCategoryViewService接口
package com.atguigu.gmall.product.service;

import com.alibaba.fastjson.JSONObject;
import com.atguigu.gmall.product.model.BaseCategoryView;
import com.baomidou.mybatisplus.extension.service.IService;

import java.util.List;

/**
 * @author: atguigu
 * @create: 2023-02-25 10:14
 */
public interface BaseCategoryViewService extends IService<BaseCategoryView> {
    /**
     * 查询所有分类列表 分类嵌套结果:一级分类分类对象中包含二级分类集合;在二级分类对象中包含三级分类集合
     * @return
     */
    List<JSONObject> getBaseCategoryList();
}
2.2.3 BaseCategoryViewServiceImpl实现类
package com.atguigu.gmall.product.service.impl;

import com.alibaba.fastjson.JSONObject;
import com.atguigu.gmall.common.cache.GmallCache;
import com.atguigu.gmall.product.mapper.BaseCategoryViewMapper;
import com.atguigu.gmall.product.model.BaseCategoryView;
import com.atguigu.gmall.product.service.BaseCategoryViewService;
import com.baomidou.mybatisplus.extension.service.impl.ServiceImpl;
import org.springframework.stereotype.Service;

import java.util.ArrayList;
import java.util.List;
import java.util.Map;
import java.util.stream.Collectors;

/**
 * @author: atguigu
 * @create: 2023-02-25 10:14
 */
@Service
public class BaseCategoryViewServiceServiceImpl extends ServiceImpl<BaseCategoryViewMapper, BaseCategoryView> implements BaseCategoryViewService {


    /**
     * 查询所有分类列表 分类嵌套结果:一级分类分类对象中包含二级分类集合;在二级分类对象中包含三级分类集合
     *
     * @return
     */
    @Override
    @GmallCache(prefix = "baseCategoryList")
    public List<JSONObject> getBaseCategoryList() {
        //1.构建所有一级分类集合对象
        List<JSONObject> resultList = new ArrayList<>();

        //2.查询分类视图获取所有的分类集合
        List<BaseCategoryView> allCategoryList = this.list();

        //3.对所有分类集合进行分组:根据一级分类ID分组
        Map<Long, List<BaseCategoryView>> category1ListMap =
                allCategoryList.stream().collect(Collectors.groupingBy(BaseCategoryView::getCategory1Id));
        int index = 1;
        //4.遍历分组后Map处理一级分类数据
        for (Map.Entry<Long, List<BaseCategoryView>> category1Entry : category1ListMap.entrySet()) {
            JSONObject category1 = new JSONObject();
            //4.1 获取一级分类ID
            Long category1Id = category1Entry.getKey();
            //4.2 获取一级分类名称
            String category1Name = category1Entry.getValue().get(0).getCategory1Name();
            category1.put("index", index++);
            category1.put("categoryId", category1Id);
            category1.put("categoryName", category1Name);

            //5.处理当前一级分类中二级分类
            Map<Long, List<BaseCategoryView>> category2ListMap = category1Entry.getValue().stream()
                    .collect(Collectors.groupingBy(BaseCategoryView::getCategory2Id));
            //5.1 遍历二级分类Map 获取二级分类ID以及名称

            List<JSONObject> category2JsonList = new ArrayList<>();
            for (Map.Entry<Long, List<BaseCategoryView>> category2Entry : category2ListMap.entrySet()) {
                //5.1.1 构建二级分类JSon对象
                JSONObject category2 = new JSONObject();
                //5.1.2 获取二级分类ID以及名称
                Long category2Id = category2Entry.getKey();
                String category2Name = category2Entry.getValue().get(0).getCategory2Name();
                //5.1.3 封装二级分类JSON对象
                category2.put("categoryId", category2Id);
                category2.put("categoryName", category2Name);
                category2JsonList.add(category2);

                //6.处理当前二级分类中包含三级分类
                List<JSONObject> category3JsonList = new ArrayList<>();
                List<BaseCategoryView> category3List = category2Entry.getValue();
                //6.1 遍历三级分类集合 构建三级分类对象;将三级分类集合 放入二级分类对象 categoryChild属性中
                for (BaseCategoryView baseCategoryView : category3List) {
                    JSONObject category3 = new JSONObject();
                    category3.put("categoryId", baseCategoryView.getCategory3Id());
                    category3.put("categoryName", baseCategoryView.getCategory3Name());
                    category3JsonList.add(category3);
                }

                //将处理后三级分类加入当前二级分类中
                category2.put("categoryChild", category3JsonList);
            }
            // 将二级分类集合加入到一级分类对象 categoryChild属性
            category1.put("categoryChild", category2JsonList);
            //7.将一级分类对象加入总结果集合中
            resultList.add(category1);
        }
        return resultList;
    }
}
2.3 service-product-client添加接口
在service-product-client模块中ProductFeignClient,提供远程调用FeignAPI接口以及服务降级方法
/**
 * 查询所有分类列表 分类嵌套结果:一级分类分类对象中包含二级分类集合;在二级分类对象中包含三级分类集合
 * @return
 */
@GetMapping("/api/product/inner/getBaseCategoryList")
public List<JSONObject> getBaseCategoryList();
@Override
public List<JSONObject> getBaseCategoryList() {
    return null;
}
2.4 页面渲染
第一种缓存渲染方式:
web-all模块中编写控制器
package com.atguigu.gmall.web;

import com.alibaba.fastjson.JSONObject;
import com.atguigu.gmall.product.client.ProductFeignClient;
import org.springframework.beans.factory.annotation.Autowired;
import org.springframework.stereotype.Controller;
import org.springframework.ui.Model;
import org.springframework.web.bind.annotation.GetMapping;

import java.util.List;

/**
 * @author: atguigu
 * @create: 2023-03-01 11:44
 */
@Controller
public class IndexController {


    @Autowired
    private ProductFeignClient productFeignClient;


    /**
     * 首页index渲染
     *
     * @param model
     * @return
     */
    @GetMapping({"/", "/index.html"})
    public String index(Model model) {
        //todo 获取渲染首页-商品数据 将来为了提高首页数据渲染,必然调用多个服务feign接口 采用异步服务编排进行优化
        //todo 获取渲染首页-广告数据
        //获取渲染首页-分类数据
        List<JSONObject> list = productFeignClient.getBaseCategoryList();
        model.addAttribute("list", list);
        return "/index/index";
    }

}
第二种方式nginx做静态代理方式:
生成静态文件
@Autowired
private TemplateEngine templateEngine;

@GetMapping("createIndex")
@ResponseBody
public Result createIndex(){
//  获取后台存储的数据
Result result = productFeignClient.getBaseCategoryList();
//  设置模板显示的内容
Context context = new Context();
context.setVariable("list",result.getData());

//  定义文件输入位置
FileWriter fileWriter = null;
try {
    fileWriter = new FileWriter("D:\\index.html");
} catch (IOException e) {
    e.printStackTrace();
}
//  调用process();方法创建模板
templateEngine.process("index/index.html",context,fileWriter);
return Result.ok();
}
解压课后资料中nginx压缩 不要中文空格
将静态文件拷贝到nginx/html目录下 包含js,css等文件夹

启动Nginx服务
访问首页

Nginx反向代理配置-了解
启动nginx,nginx目录下打开命令行
start nginx关闭nginx
nginx -s stop重新加载nginx配置文件
nginx -s reloadnginx.conf配置文件
	#配置集群列表 默认负载均衡策略为轮询
	upstream gatewayUpstream {
	   server 127.0.0.1:80 weight=3;
	   server 127.0.0.1:81 weight=1;
	   server 127.0.0.1:82 weight=1;
	}

   server {
       listen       88;
       server_name  localhost;

       #charset koi8-r;

       #access_log  logs/host.access.log  main;
		#配置监听的请求路径
       location / {
           #root   html;
           #index  index.html index.htm;
           #将请求地址以"/"开头的全部反向代理到网关集群服务列表
			proxy_pass http://gatewayUpstream;
       }
}
后端的网关服务要搭建集群

通过Nginx访问服务测试 http://localhost:88/api/product/inner/getBaseCategoryList

网关中配置全局过滤器可以确定访问的是哪个服务
package com.atguigu.gmall.gateway.filter;

import com.atguigu.gmall.common.util.IpUtil;
import lombok.extern.slf4j.Slf4j;
import org.springframework.cloud.gateway.filter.GatewayFilterChain;
import org.springframework.cloud.gateway.filter.GlobalFilter;
import org.springframework.core.Ordered;
import org.springframework.stereotype.Component;
import org.springframework.web.server.ServerWebExchange;
import reactor.core.publisher.Mono;

/**
* GateWay网关过滤器-全局过滤器:针对有所有路由生效
*
* @author: atguigu
* @create: 2023-04-17 10:24
*/
@Slf4j
@Component
public class AccessFilter implements GlobalFilter, Ordered {

   /**
    * 过滤器逻辑
    *
    * @param exchange 交换器 封装请求,响应对象
    * @param chain    过滤器链
    * @return
    */
   @Override
   public Mono<Void> filter(ServerWebExchange exchange, GatewayFilterChain chain) {
       String ipUrl = IpUtil.getGatwayIpAddress(exchange.getRequest());
       log.info("AccessFilter 网关服务被访问:"+ipUrl);
       return chain.filter(exchange);
   }

   /**
    * 过滤器执行顺序 值越小:优先执行
    *
    * @return
    */
   @Override
   public int getOrder() {
       return 0;
   }
}